One of the projects we have been working on at work consists of converting physical servers to virtual machines in our Hyper-Converged Infrastructure (HCI). In addition to physical servers, we also need to move virtual machines from our Hyper-V and VMWare environments into HCI.
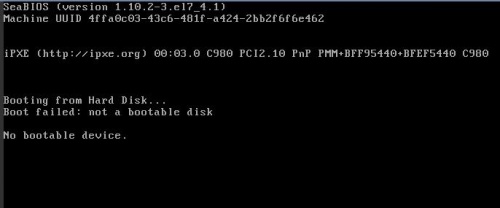
One of the issues we are running into is that some of the machines do not boot after conversion or after moving to HCI. The difference between the machines that do boot and the one’s that do not was discovered to be the fact that the one’s that have issues were configured with UEFI. Since these machines were configured with UEFI, there really is no BCD boot device that the HCI BIOS can boot into.
OVERALL STEPS
There are some extra steps we needed to perform to get the virtual machine to work properly in the HCI environment.
First, we needed to get the virtual machine boot drive into VHDX (Virtual Hard Disk v2) format. If the source system is Hyper-V, then there is no conversion involved. But from VMWare, we need to convert from VMDK (Virtual Machine Disk) to VHDX. There are a lot of tools out there that we can use, but the one we found to consistently work is QEMU. This command-line tool allows you to quickly convert the virtual machine disks to different formats such as VMDK, VHD, VDI, QCOW2, and more.
Once we had the boot drive in VHDX format, we can then mount it as a drive on a Windows computer so we can convert from GPT (GUID Partition Table) to MBR (Master Boot Record) using the free version of the AOMEI Partition Assistant tool. This tool allowed us to first convert the disk to MBR from GPT and also remove the unnecessary partitions.
Once it was converted to MBR and the partitions removed, we could then unmount the disk and import or take it to the final virtual host server (HCI) and attach it to a virtual machine.
Finally, we still needed to boot from the operating system install ISO image so we could make sure we set the proper partition as the active partition. That was the final step that allowed us to boot into the Windows operating system.
CONVERT TO VHDX
As stated above, we needed to have the virtual machine disk in the VHDX format. And to do that, we used the QEMU tool to convert to the VHDX format.
To do this, open a Command Prompt or PowerShell and change directory to the installation directory of QEMU.
CD 'C:\Program Files\qemu\'Code language: DOS .bat (dos)Once in the directory, use the following commands to convert:
Convert VMDK to VHDX
.\qemu-img.exe convert -O vhdx C:\VMDK\SVR01.vmdk C:\VHDX\SVR01.vhdxCode language: DOS .bat (dos)Convert VHD to VHDX
.\qemu-img.exe convert -O vhdx C:\VMDK\SVR01.vhd C:\VHDX\SVR01.vhdxCode language: DOS .bat (dos)CONVERT GPT TO MBR
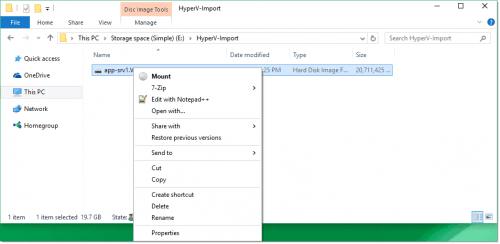
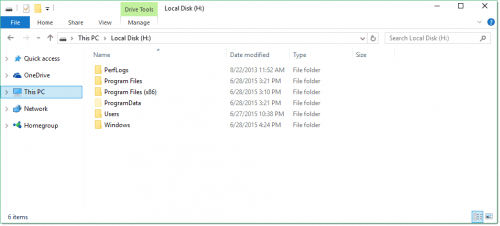
First, download the AOMEI Partition Assistant tool and install it on your computer. Then right-click on the converted VHDX file and click on Mount. The VHDX image will automatically mount and open in File Explorer. The Mount option is available on any computer running Windows 8 or later.
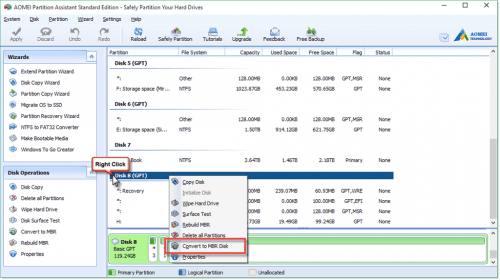
Next, open AOMEI Partition Assistant and find the disk drive that you just mounted. Right-click on the drive (it should show GPT) and select Convert to MBR Disk. Accept the warning message then click the Apply button at the top left to commit the changes.
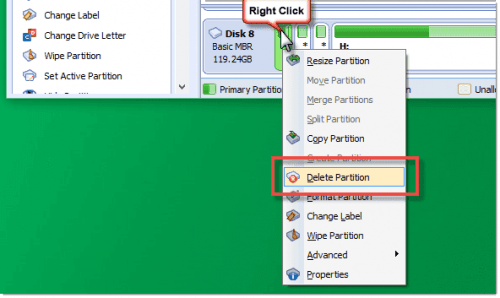
Then, right-click on each of the extra partitions at the beginning of the disk and choose Delete Partition. These are usually the three tiny partitions before the primary large partition where the Windows installation resides.
Click on the Apply button again at the top left to commit the changes. Once the operating completes, close the AOMEI Partition Assistant tool.
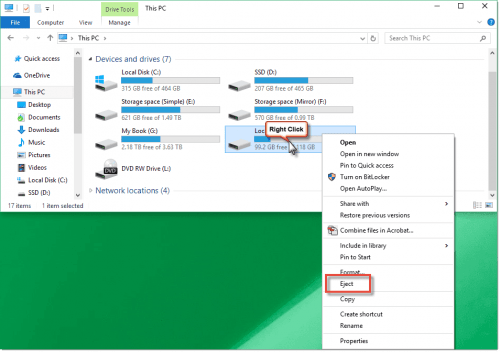
Finally, you need to eject the drive that was mounted from the VHDX file. Go to File Explorer, right-click on the mounted drive and choose Eject.
CREATE A NEW VIRTUAL MACHINE
Once we had the VHDX converted and unnecessary partitions removed, we needed to create a new virtual machine in our HCI environment and attached the VHDX to it. We also needed to attach the operating system ISO image as the boot CD/DVD drive (we needed to boot from the CD so we could perform the final repair step). Boot up the new VM and make sure it boots from the CD — in our case using the Windows 2012 R2 installation media ISO image.
REPAIR THE DISK
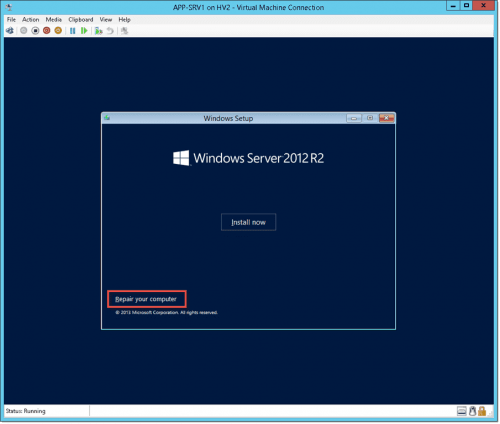
Once the VM boots into Windows setup, select Next on the first screen and then click Repair your computer option on the bottom left.
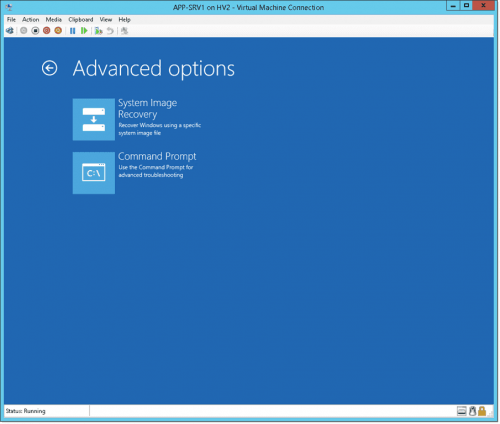
Click on Troubleshoot and then click on the Command Prompt option.
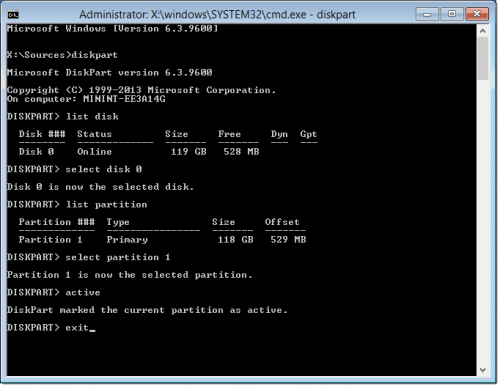
When the Command Prompt window opens, use the following commands (one at a time) to set the partition that has the Windows installation as active.
diskpart
list disk
select disk 0
list partition
select partition 1
active
exit
Code language: DOS .bat (dos)
Here is what it would look like if you do everything correctly.
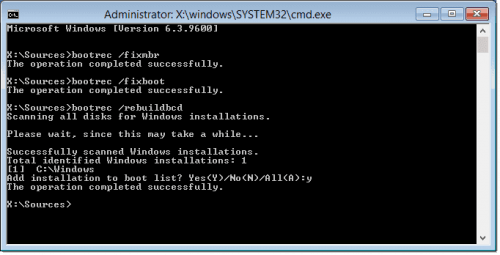
At this point, you can try exit (again) the Command Prompt and see if you can now boot into Windows. If so, you should see the option in the Advanced options screen. If not, you can run the following command (one at a time) to attempt to fix the MBR.
bootrec /fixmbr
bootrec /fixboot
bootrec /rebuildbcd
Code language: DOS .bat (dos)
Here is what it would look like. You will need to select Y in the last command to add the installation to the MBR.
Now close the Command Prompt by typing in the exit command. Detach the Windows OS ISO image and reboot the VM. The VM should now boot properly. You may need to update/install/remove drivers depending on the host.
Please share your experience in the comment section below.

